I've seen several logos lately featuring the reflection effect displayed in this image:
As it turns out, this effect is astonishingly simple to create using my favorite vector editor, Inkscape
Ready? Let's get cracking. Open up Inkscape. Select File | Document Properties from the top menu and change the page orientation to landscape. (Click on the examples for larger sizes)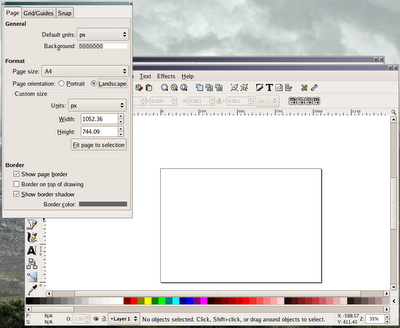
Resize the window so it's comfortable for you and then select the Text tool from the left-hand toolbar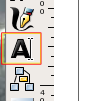
Type some text. It's best to use all caps for the first try. Either that, or avoid using characters with descenders - y, p, g, etc. If you want a different font, select the Font tool at the top of the window.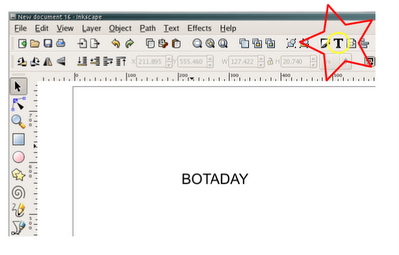
Now, let's resize the thing to fit the page. Make sure the text is selected (you'll see arrows surrounding it after you click on the Selection tool on the lefthand tool bar). Select Object from the menu at the top of the main window and then Transform... In the Transform Object dialog box, select Scale. Click the Scale proportionally checkbox, make sure the unit of measurement is percentage (%) and enter a value of 10.
Click on Apply repeatedly until the text fills the page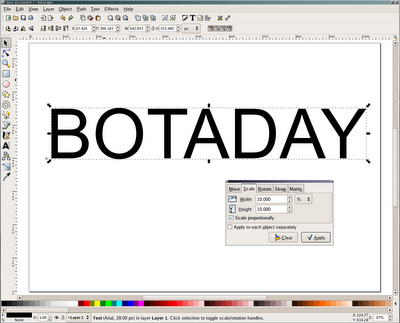
Copy and paste the text. Position the new copy beneath the original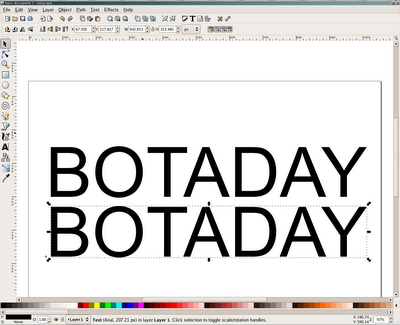
Click on the Flip vertical button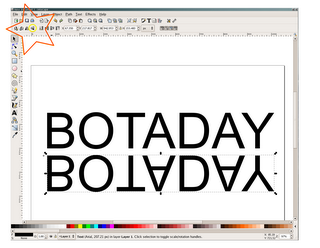
Move the bottom text so there's just a slight bit of horizontal separation between the two. Align it directly below the top text.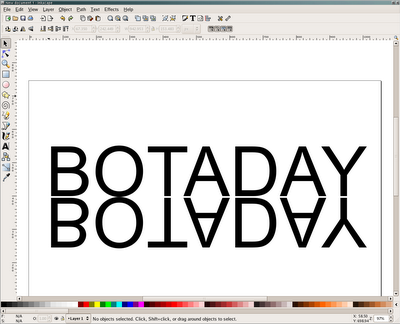
Okay. This is the money shot. Select the Gradient tool from the lefthand tooldbar, and then select the bottom text. Pick a point in the middle-top of the bottom text and you'll see the text disappear and then begin to reappear in a fade as you drag the mouse.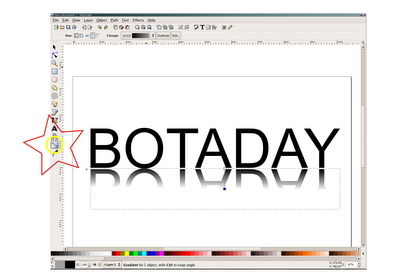
Now, in order to make an image you can actually use, we're going to create a new layer, add a big, white rectangle to it, and then push it to the bottom.
Select Layer | Add layer (1) from the main window top toolbar. Give the layer a name (I usually just type an "a") and click Add. Select the Create Rectangles and Squares tool (2) from the lefthand toolbar. Draw a square over all of the existing text. Once you've drawn your square, you're going to want to use the Object | Fill and Stroke (3) top toolbar selection to make sure you have a white square (fill) with no border (stroke).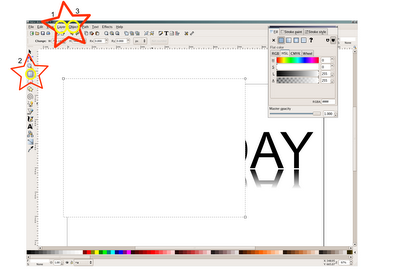
Now that you have your text entirely covered with the white square, select Layer | Layer to Bottom from the top menu. Your text should reappear.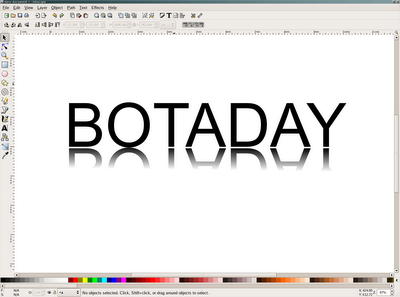
Now select File | Export Bitmap from the top menu. Make sure Drawing is selected at the top of the Export dialog box. Choose a name for the image - botaday.png in this case - and click Export.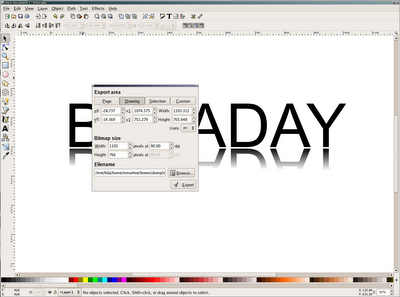
I leave it as an exercise for the reader to color the text and to more gracefully fade the reflection.
Cheers!
Saturday, February 10, 2007
Time for a New Tutorial
Posted by
MjM
at
2/10/2007 07:23:00 AM
0
comments
![]()
Subscribe to:
Posts (Atom)
Random Post
- ► 2011 (134)
- ▼ 2007 (141)
- ► 2006 (239)


