


Get 'em while they're hot!
Refer to the instructions here.
Sample gag for Santabot 3.3:
This is how Santa watches everyone sleep... ...with infrared night-vision goggles
Showing posts with label howto. Show all posts
Showing posts with label howto. Show all posts
Wednesday, December 19, 2007
Santabot Card II


 Delicious
Tuesday, December 18, 2007
Santabot Card I

For those of you looking for a quick, quasi-handmade gift, I present the Santabot card.
If you click on this image and then right-click on the subsequent image and save it, you can then print your own Santabot Greeting Card.
(It should go without saying that the following information can be useful for making homemade cards even if they're not Santabots, sniff)
The full size of the image is 7x10 inches. When folded in half length-wise, it fits snugly in a standard 5x7 inch greeting-card envelope.
I have never had a problem getting single sheets of standard-weight card stock through an inkjet printer, but not all printers are the same. Mine is an HP DeskJet 3745. I cannot speak for others.
To avoid wasting card stock, you might want to test the alignment with a sheet of printer paper first. If the image cuts off, try reducing it or monkeying with the margins in the printer dialog box of whatever software you are using - Microsoft Image Viewer, Firefox, Ogg's Cave Painter 6.0, etc.
(My favorite software tools for image manipulation are the Gimp and Inkscape. Free and available even for hapless Windows users)
If you plan on making a lot of cards, think about finding a paper-cutter; cutting card stock precisely with scissors or a blade and a straight edge is time-consuming, frustrating and not a little dangerous. I personally took my card stock to Office Max and hacked out a pile o' blanks.
Happy Hollandaise!
Following are some of the gags I wrote inside the Santabot 5.7 cards I sent out this season:
"No laser guided missiles for you. You'll take the doll and like it!"
"Santabot brought you a doll. Get over it, human!"
Monday, February 12, 2007
Graphic Arts Used to be Hard

I did this in about 3 minutes, not counting writing on a piece of paper with a Sharpie ™ and scanning it in. Back the day, it would take hours to do something like this with traditional tools - markers, airbrush, india ink, etc.
Click on image for fullness.
Saturday, February 10, 2007
Time for a New Tutorial
I've seen several logos lately featuring the reflection effect displayed in this image:
As it turns out, this effect is astonishingly simple to create using my favorite vector editor, Inkscape
Ready? Let's get cracking. Open up Inkscape. Select File | Document Properties from the top menu and change the page orientation to landscape. (Click on the examples for larger sizes)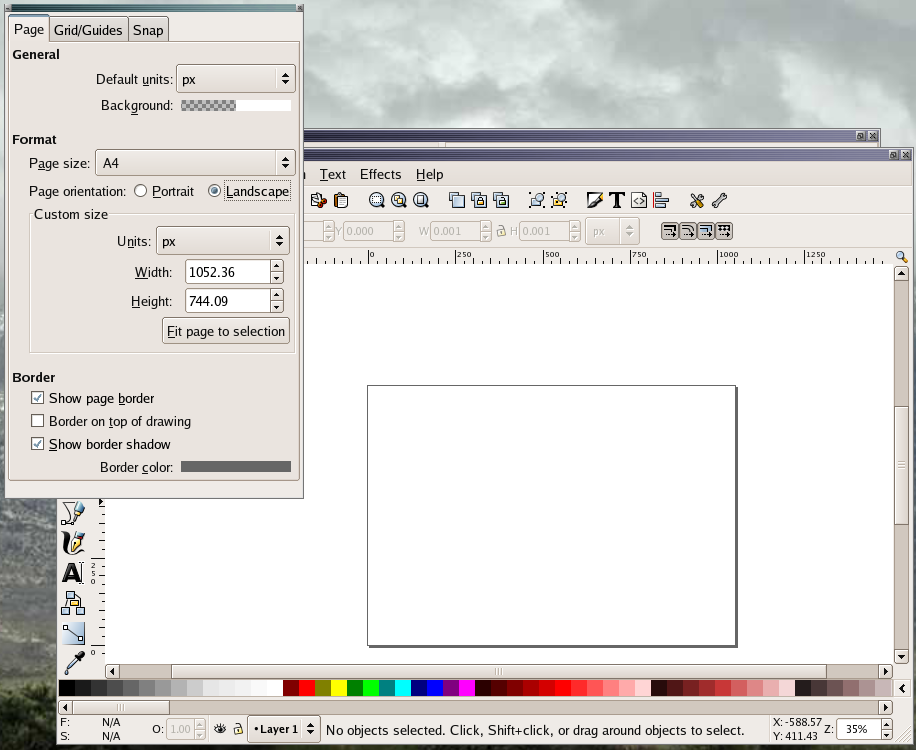
Resize the window so it's comfortable for you and then select the Text tool from the left-hand toolbar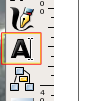
Type some text. It's best to use all caps for the first try. Either that, or avoid using characters with descenders - y, p, g, etc. If you want a different font, select the Font tool at the top of the window.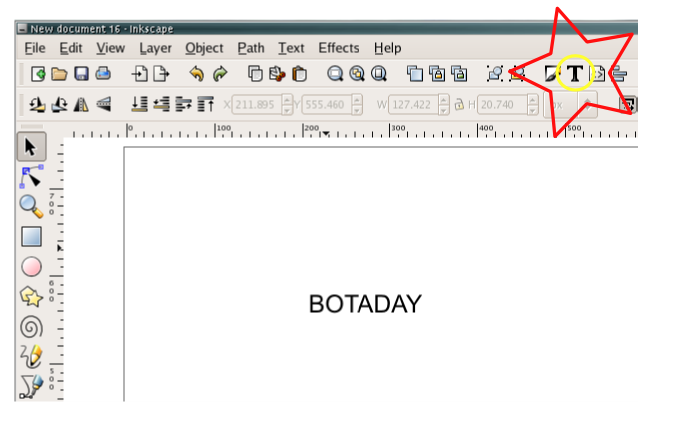
Now, let's resize the thing to fit the page. Make sure the text is selected (you'll see arrows surrounding it after you click on the Selection tool on the lefthand tool bar). Select Object from the menu at the top of the main window and then Transform... In the Transform Object dialog box, select Scale. Click the Scale proportionally checkbox, make sure the unit of measurement is percentage (%) and enter a value of 10.
Click on Apply repeatedly until the text fills the page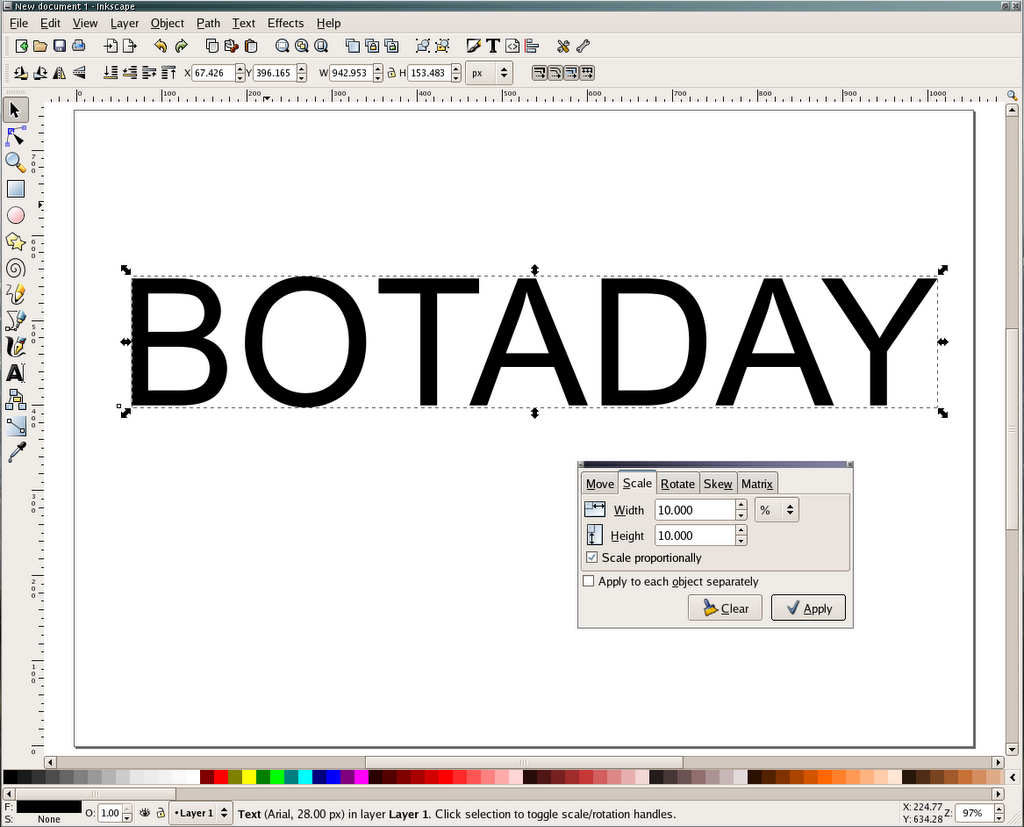
Copy and paste the text. Position the new copy beneath the original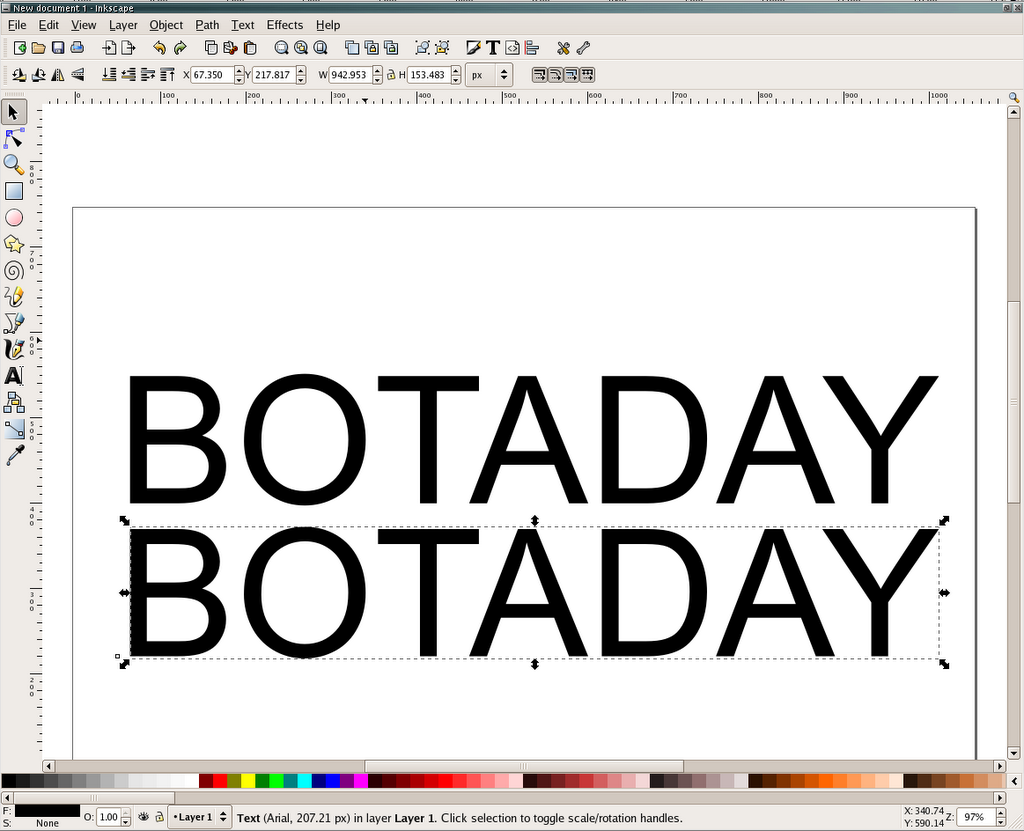
Click on the Flip vertical button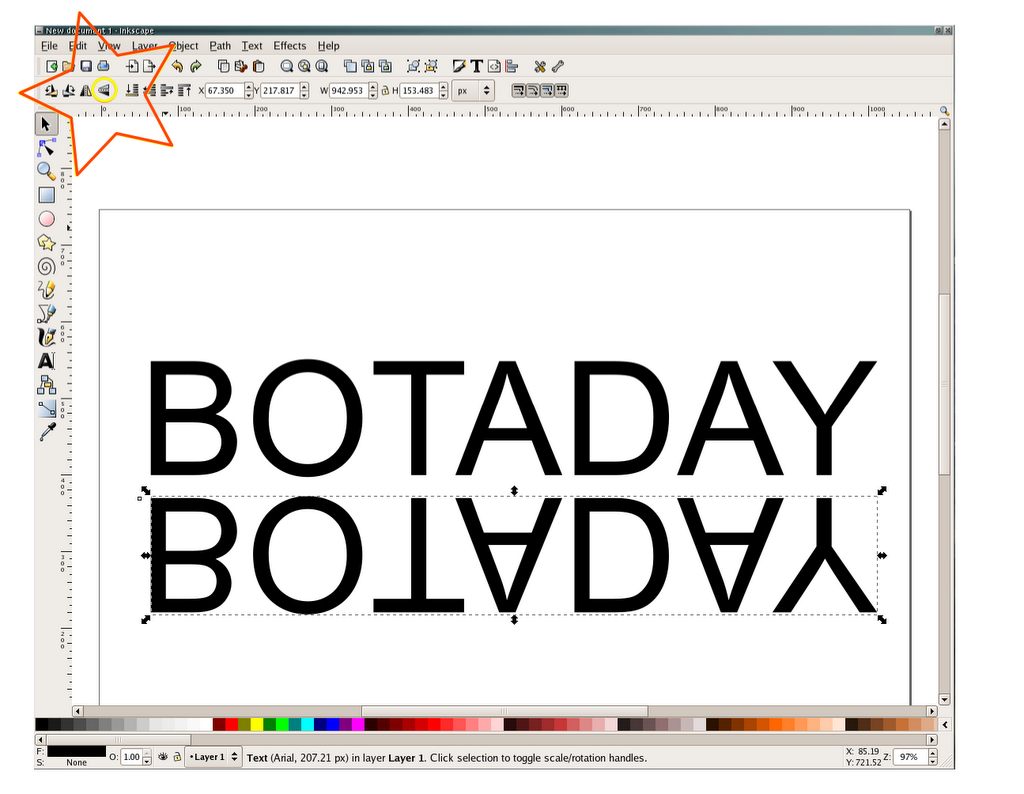
Move the bottom text so there's just a slight bit of horizontal separation between the two. Align it directly below the top text.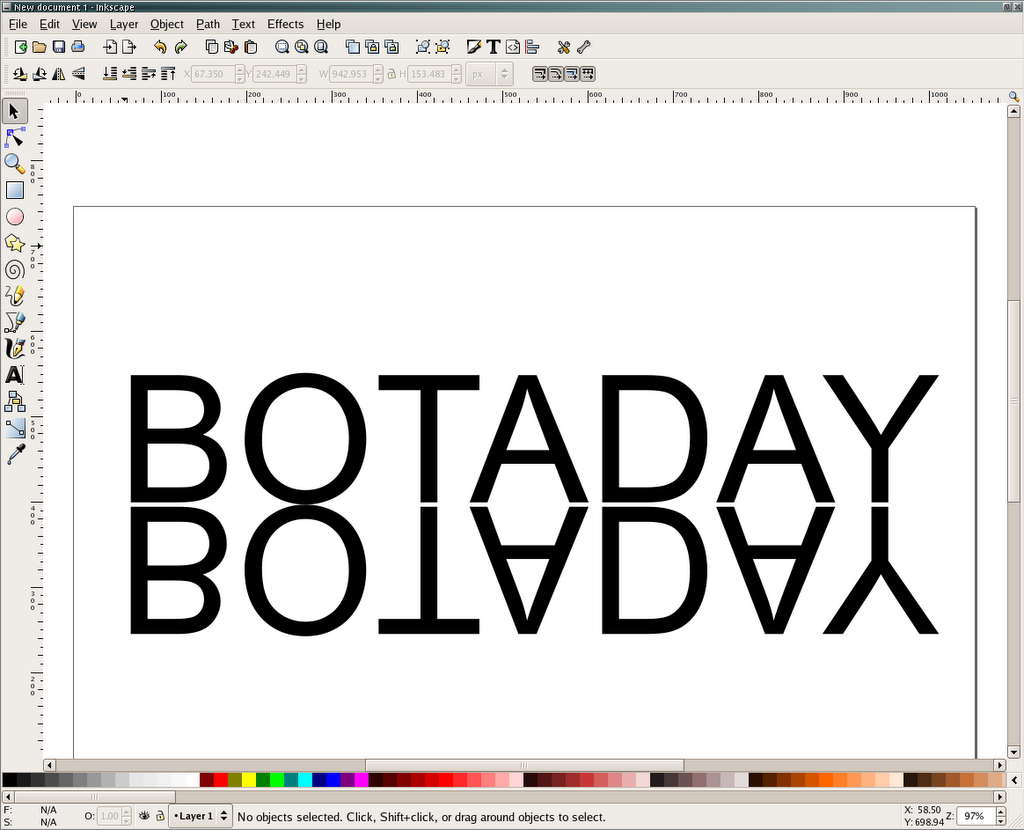
Okay. This is the money shot. Select the Gradient tool from the lefthand tooldbar, and then select the bottom text. Pick a point in the middle-top of the bottom text and you'll see the text disappear and then begin to reappear in a fade as you drag the mouse.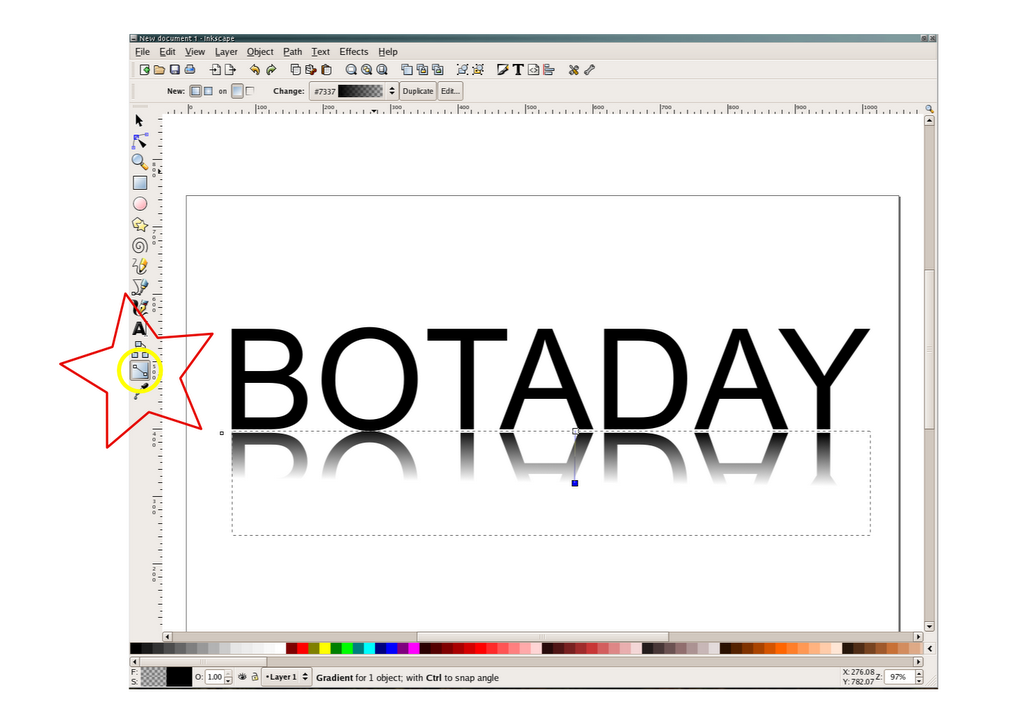
Now, in order to make an image you can actually use, we're going to create a new layer, add a big, white rectangle to it, and then push it to the bottom.
Select Layer | Add layer (1) from the main window top toolbar. Give the layer a name (I usually just type an "a") and click Add. Select the Create Rectangles and Squares tool (2) from the lefthand toolbar. Draw a square over all of the existing text. Once you've drawn your square, you're going to want to use the Object | Fill and Stroke (3) top toolbar selection to make sure you have a white square (fill) with no border (stroke).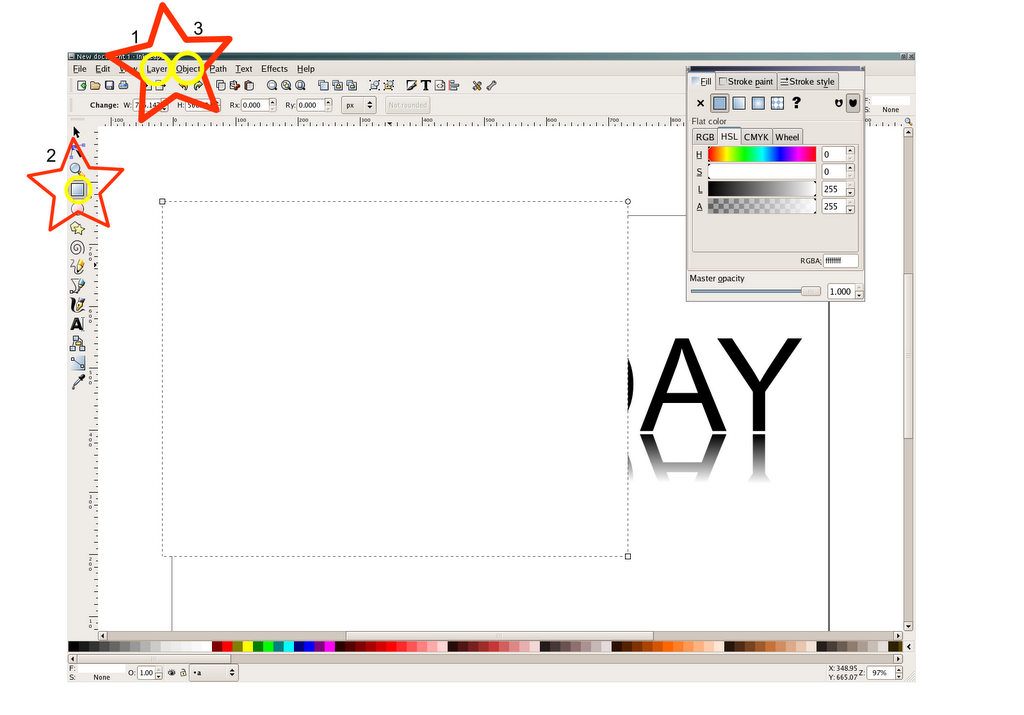
Now that you have your text entirely covered with the white square, select Layer | Layer to Bottom from the top menu. Your text should reappear.
Now select File | Export Bitmap from the top menu. Make sure Drawing is selected at the top of the Export dialog box. Choose a name for the image - botaday.png in this case - and click Export.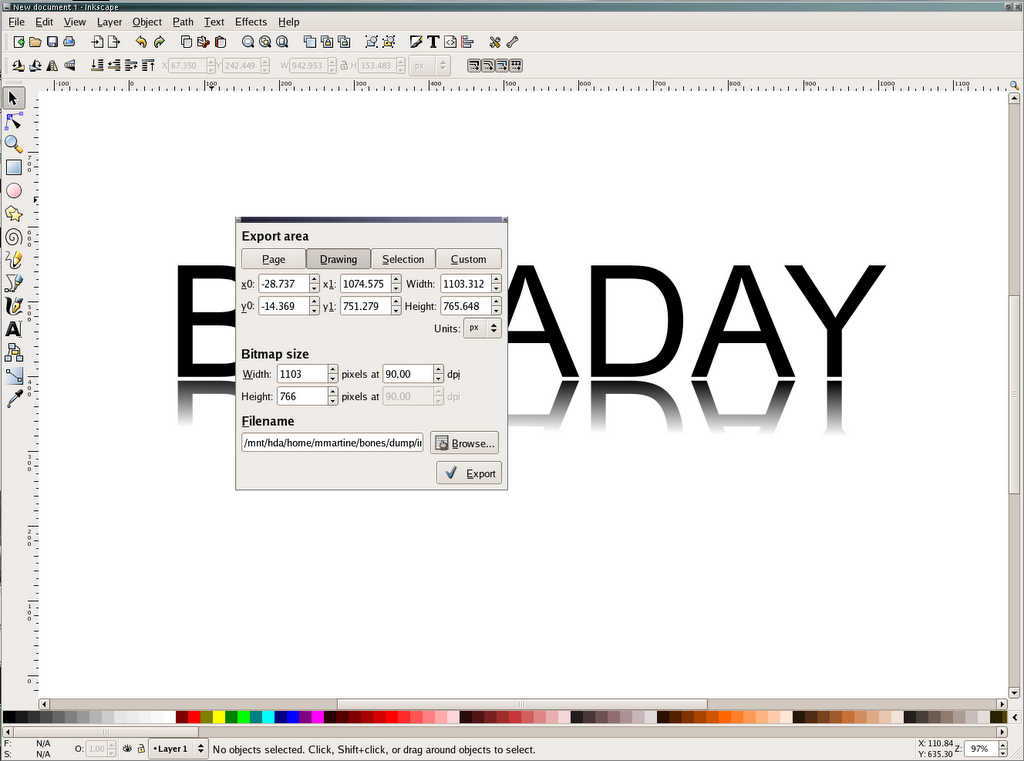
I leave it as an exercise for the reader to color the text and to more gracefully fade the reflection.
Cheers!
Sunday, October 22, 2006
How to Hack a BW Image into a T Shirt

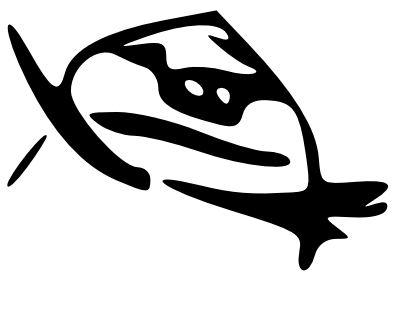
The image at top left is usually reproduced at 50x50 pixels. It's been zoomed up here in order to show what happens to a pixellated image when zoomed up.
The image on the right is a bitmap tracing of the above image, also zoomed up, but with superior staying power.
The purpose of this post is to demonstrate how to take black & white images off this blog (or any other online graphic source) and pervert them to your own evil desires.
Simply right-click-copy your desired graphic and then open it in Photoshop or Corel Draw. (If you can't afford PS or CD, Inkscape is an excellent alternative). For the purposes of this howto, we're going to use Inkscape.
In Inkscape, highlight the image and then select Path | Trace Bitmap and then click on OK on the resulting pop-up box. Close the pop-up box and drag the top image out of the way. The original, pixellated image should be below. Delete that. Move the new image back into its place. Sweet, right?
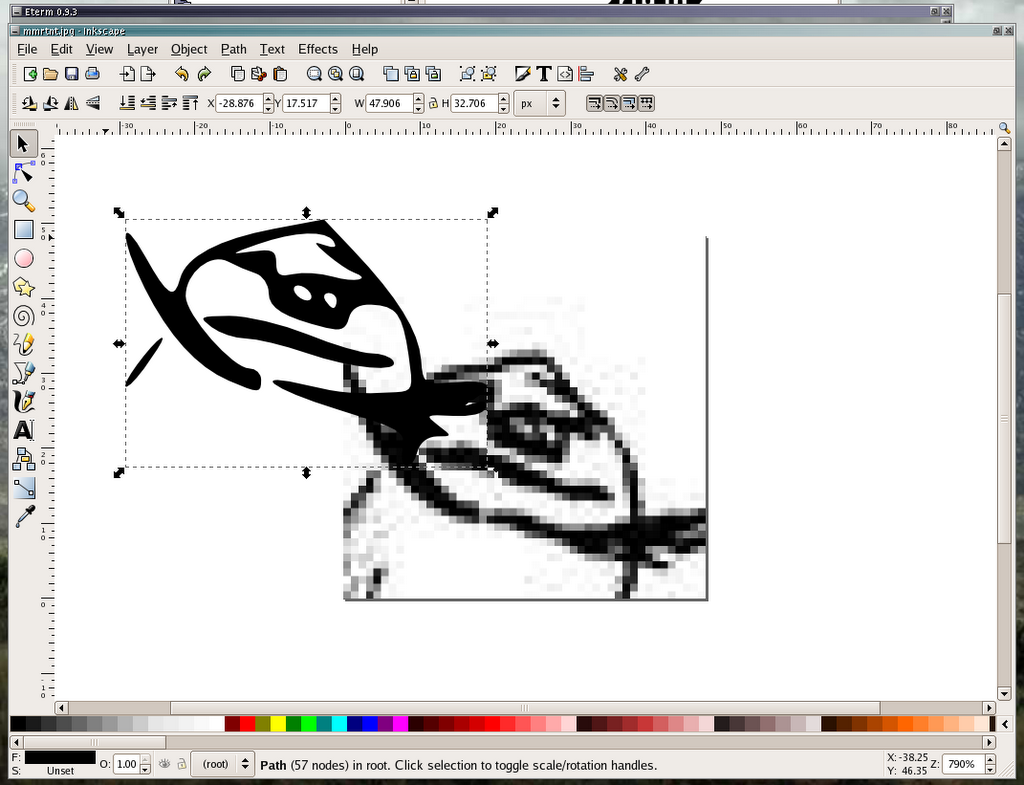
Click outside the image to remove the selection arrows. Now, select Layer | Add Layer from the top Menu bar. Give it a name - b, bg, background - whatever. Now, select the box symbol from the lefthand side of the main window. It's the one below the spyglass in the graphic below.

At the bottom of the main window, there's a gradated scale of colors. Real quick, click on the white square. Now, drag and draw a window which covers the image in white. You have just added a white layer on top of the image. On the top menu, select Layer | Layer to Bottom. The original image should reappear.
Congratulations! You're almost done. This is the Money Shot. Now, you can rescale the image to any size you like and not lose resolution. Until you save it. When you save it, it will be frozen at the saved size. If you try to resize the saved image, you'll run into pixellation problems again.
You can also save it as an EPS file. This is a file you can't look at, but you can send to a screen printer for shirts or a print shop for window clings.
In other words, you can take the tiniest little b&w graphic and blow it up into a t-shirt. Cool, huh? Your mileage will vary in attempting to use this trick for color photos and other more complicated images. But try it. You'll definitely get some interesting results.
Bottom Line
You can do this to any image here. I would prefer you buy t-shirts from me, but maybe you can't afford me. Maybe I don't offer that one little cut of a graphic that you find cute.
But God help you if you should try to sell my images. Eeeh.
Whatever, take this tip and run with it and more power to ya!
¡viva la revolucion!,

MjM
Tuesday, November 01, 2005


Subscribe to:
Posts (Atom)